Sunday, December 18, 2011

Yet Another Project!

Two posts in one night?! This is craziness!!

Here is another project I did recently that was easy to make and again cheap!

To make the "Merry Mail" Christmas Card holder you will need:
Wooden Plaque
Paint/Paintbrushes
Ribbon
Hot Glue Gun

1. First paint the entire wood plaque the color of your choice and allow to dry.
2. Then I decided to paint gold dots on mine, but you could also do another pattern. Allow to dry

3. Paint on "merry mail" in another color, I used red.

4. When everything is dry, glue on e bow ribbon at the top and ribbon strands to the bottom

5. Attach Christmas cards! I used close-pins

I love the way it turned out! I hung mine on the closet door next to the front door where the mail comes in, that way its easy to add the new cards that arrive!

PS, 
Isn't Milly getting so big? She turned 1 on December 8 and now weighs 61 lbs.! Love my Christmas Puppy!

Pinterest Has Taken Over My Life!

Like many other people, I AM OBSESSED WITH PINTEREST! There are so many great ideas and recipes on there and I have currently been "doing" instead of just "pinning"! I thought I would share a few of my projects:

Coasters: These are so easy (and cheap!) to make.

Materials:
Tiles from Lowe's or Home Depot
Scrapbook Paper from Hobby Lobby or Michael's
Mod Podge
Acrylic Finishing Spray
Sponge Paintbrush
Cork or Felt (I used felt, because it was cheaper)

How To:

1. Lay your tiles out and paint on the Mod Podge! (Only do one at a time because it will dry before you can apply the paper if you do more than one at a time)
2. Place the scrapbook paper square on the tile, that you previously by tracing around the tile

3. Let dry for 3-5 minutes
4. Apply a layer of Mod Podge to the top of the scrapbook paper tile and let dry for 10 minutes or so

5. Repeat step four a few more times
6. Allow to dry overnight
7. Spray acrylic spray according to can directions and let dry
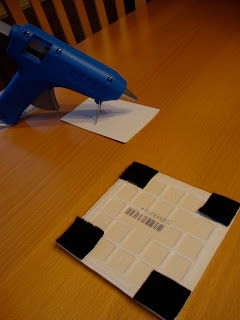
8. Use a hot glue gun to apply cork or felt. You can cover the entire bottom or just cut squares to put at each corner


TA DA! It's so easy and they turn out so cute!!
Happy Reading (And Crafting!)